Simplify3D - Software for FDM 3D printing.
Simplify3D is a commercial 3D printing software that has successfully established itself in the 3D printing market. Simplify3D replaces the Repetier-Host and Slic3r packages and allows you to import various files, scale the model up and down, and create G-code before actually printing.
The full capabilities of Simplify3D can be viewed clicking here
Current version of the program:
5.1.2
To learn how to use Simplify3D click here
To find out how to adjust the actual extrusion width click here
How to prepare a profile for your 3D printer.
Very often the question arises: where to get a profile for a 3D printer if the printer is not in the standard set inside the program itself. To begin with, it is worth noting that the profile can be bought here. If you feel sorry for the money or have free time, then below is an instruction for setting up a profile on your own. To get started, you need download starting set of files. For those who have never used the Simplify3D program, it's better to watch this video for a start:

Work plan:
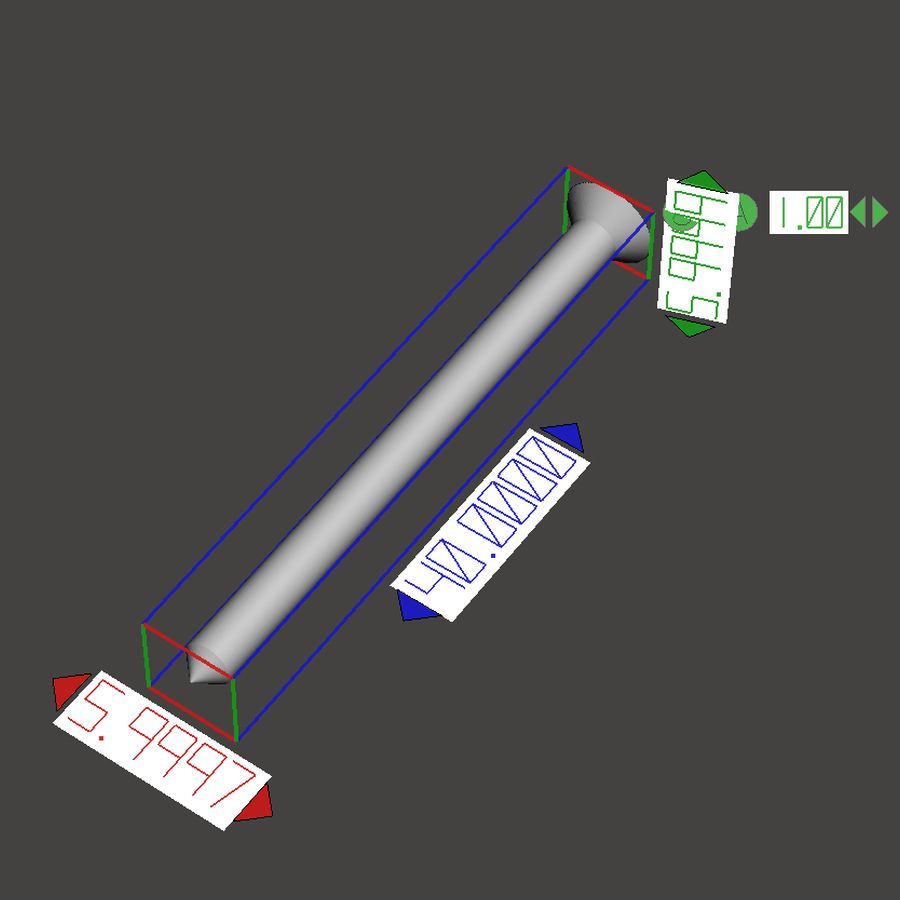
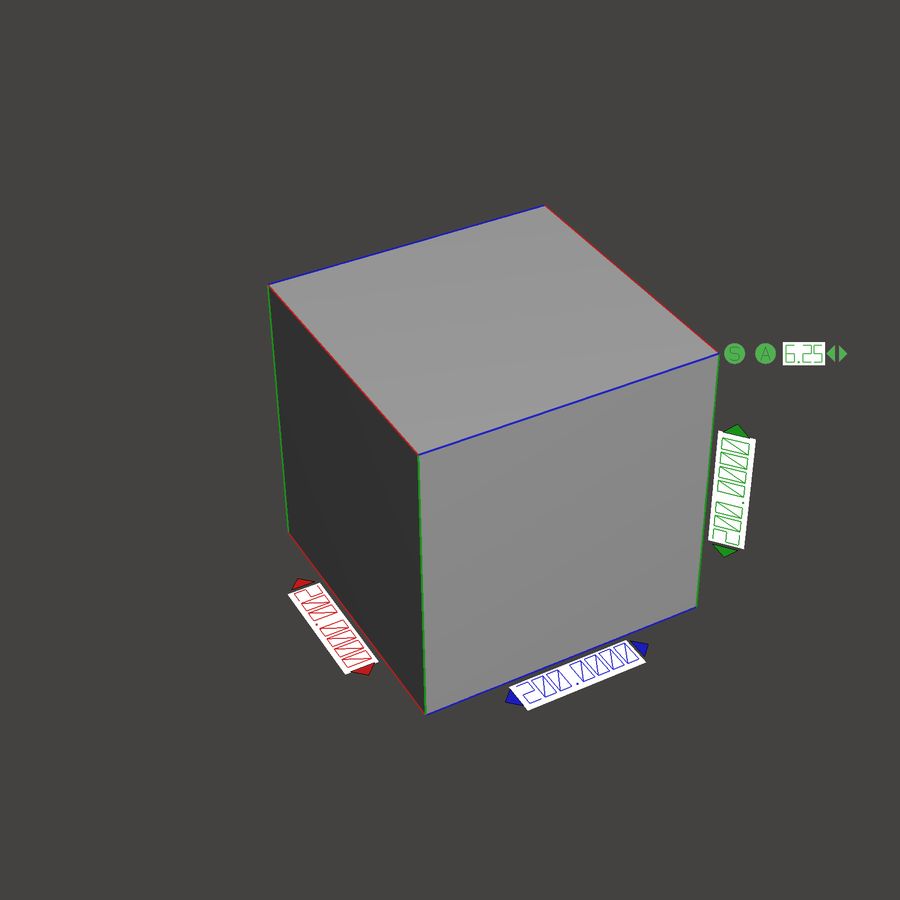
- Customize actual extrusion width... To do this, we need a cube number 1 from a set of files. The parameter that sets the actual extrusion width is shown in the picture below.

- It is necessary to set 100% Infill in the model. There is a small snag here. Simplify3D will not give the desired result if you just turn the infill slider to 100%. In order for the program to actually print with 100% coverage, you must specify a very high value in the “bottom or top overlap” parameter (must exceed the number of layers in the entire model). In this case, the printer will paint over each layer - that's what we need!

- We start to print, having previously selected the required temperature and layer height for which we are setting the profile. What to look for when printing and after printing it:
- Fill lines on each layer should not have gaps. Gaps indicate that the actual extrusion width has not been correctly selected.
- The vertical wall should not have gaps in the layers. If they are, then 3 parameters need to be adjusted. The first parameter is the temperature of the nozzle. It is necessary to raise the temperature, because the plastic simply does not have time to melt. In this case, you can reduce the print speed, but the print speed should not be less than 45 mm / s. Otherwise, the speed of production of the model will be poor. If the first two parameters did not give the desired result, then we increase the plastic feed. The combination of these parameters should give the desired result. The result of this test should be a perfect cube. If you succeed, you can safely go further.
- We check the rate of plastic rollback when moving. The program gives the name to this indicator - “retraction”. Two values are responsible for it: the rollback rate and the rollback amount. You need to find such parameters by selection so that when moving from the previous perimeter to the next, the nozzle does not pull hair (snot) along with it. As a check for this point, we need file number 4 from the set of files that you mentioned earlier. We install on the platform 3 pieces of parts with the following parameters: Infill 0, wall in 2 layers, no lower and upper overlap. We start typing.

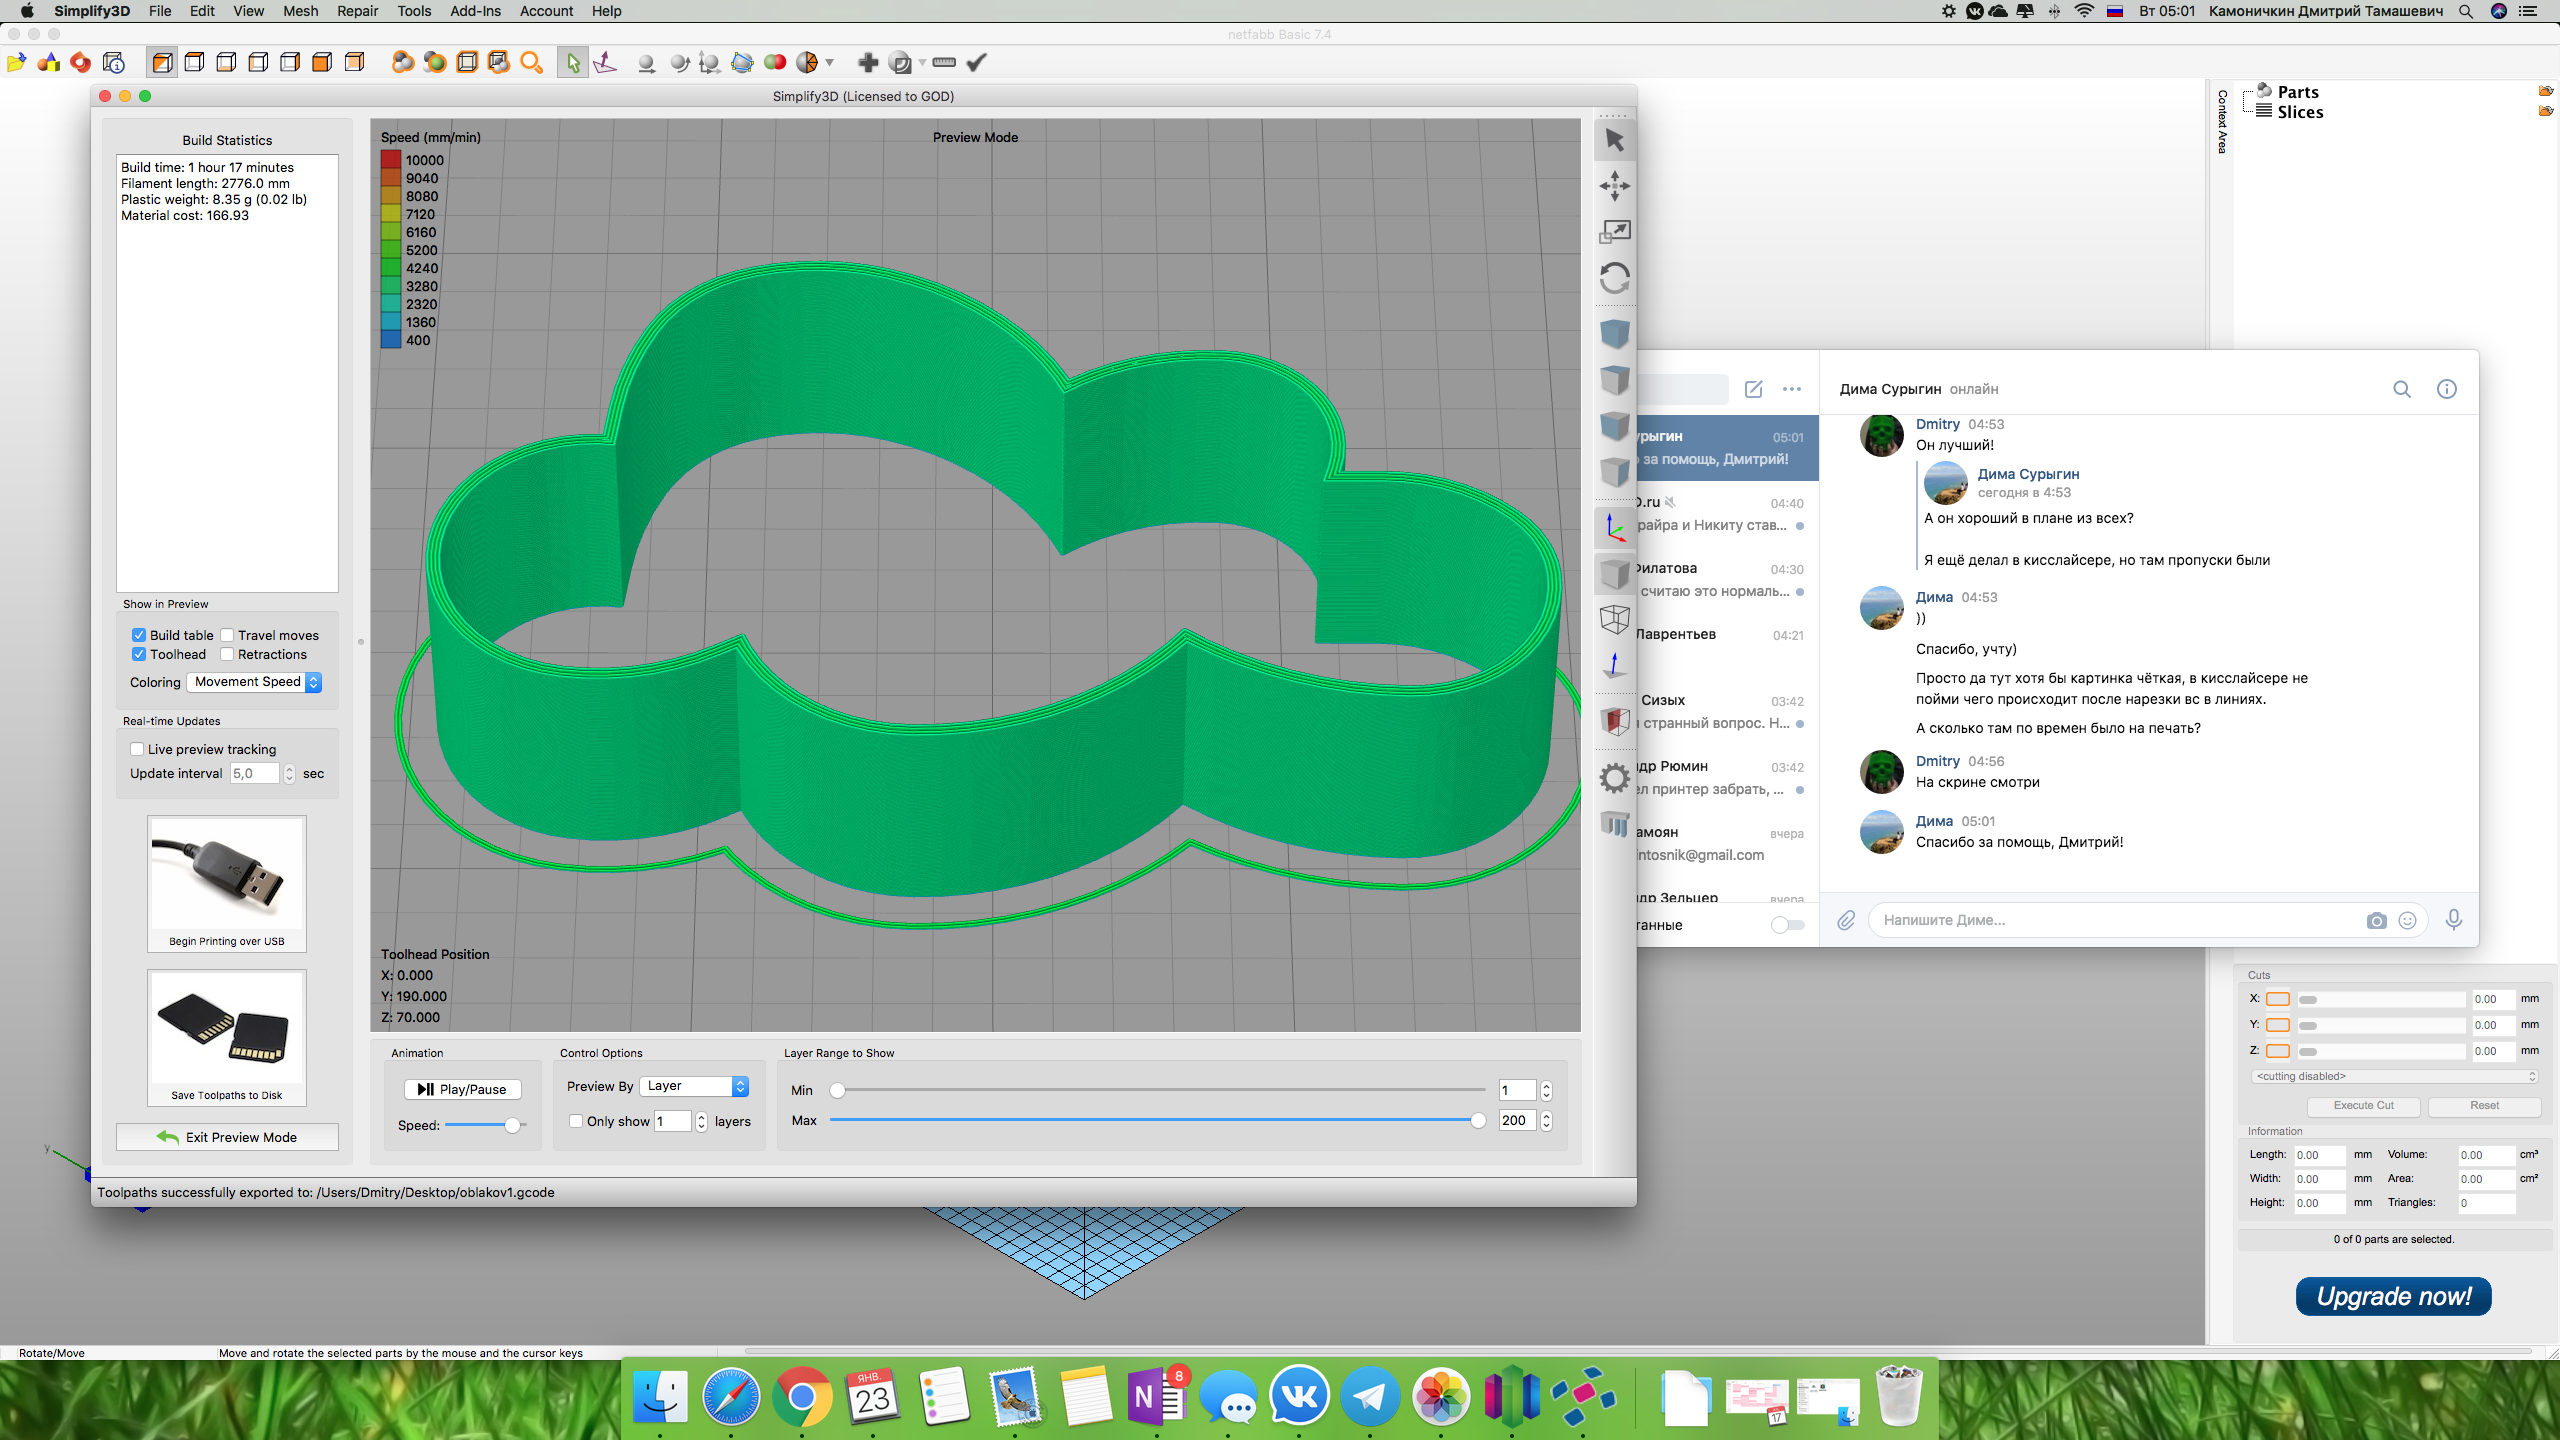
- If you have got three cylinders without snot and threads, then you have set everything up qualitatively and you can proceed to the next item, which is to check the overlap of the upper layers. Add file number 2 to the platform. Set the top overlap to 10! Exactly at 10! And we print. The result of this point should be an ideal and even wall on the side face, which is shown in the figure.

- Now we start decreasing the value of the top overlap: 9, 8, 7, 6 and so on until we get a bad result. As soon as you see the poor-quality drawing of the wall, roll back one point and save the settings. Let's move on.
- The last point is to set up the correct construction of the supporting material. I will not repeat the points that are explained in the video. However, I will describe separately the possibility of setting the layer skip parameter. As you can see in the picture below, this is possible. Thus, you will be able to easily separate the support from the basic model. I will only clarify the fact that you do not need to use this parameter in the case of printing with soluble supports!

That's all. I wish you success in mastering.


Author: Studia3D aggregator
More articles from Studia3D aggregator